Author: Aminur Islam
How to Set Up an Existing WordPress VIP Site Locally on macOS

A quick guide to cloning a live WordPress VIP site to your MacBook for local development. Follow these commands in order.
Step 1: Install the Required Tools
Install Docker Desktop and VIP-CLI:
brew install --cask docker
npm install -g @automattic/vip
After installing Docker, open it from your Applications folder so it starts running in the background.
Verify all tools are installed:
vip -v && node -v && npm -v && docker --versionPlease skip Step 2 & Step 3 if you are setting up an existing WordPress VIP site from a backup instead of cloning the WPVIP GitHub repository.
Step 2: Log In to VIP-CLI
vip logout   # in case of stale session
vip login
The logout command clears any old session. vip login opens a browser window to authenticate with your VIP account.
Step 3: Clone the Site Repository
cd ~/Sites
git clone git@github.com:wpcomvip/your-site-name.git
cd your-site-name
Replace your-site-name with the actual repository name from your VIP application.
Step 4: Create the Local Environment
vip dev-env create --slug=your-site
You can name –slug anything unique you want but follow the rules lowercase letters, numbers, and hyphens only. No spaces, no underscores, no special characters. Common conventions: wp-vip-test-site.
A setup wizard will appear. Match production for PHP version, WordPress version, and multisite settings. When asked for the application code source, choose Local folder and provide the path to your cloned repo.
- Site title: anything
- Multisite: match production
- PHP version: match production
- WordPress version: match production
- Source for application code: choose Local folder and give it the absolute path to your cloned repo (e.g.
/Users/you/Sites/your-site-name) - Source for mu-plugins:
auto(pulls VIP’s mu-plugins automatically) - Source for VIP MU plugins:
auto
Step 5: Start the Environment
vip dev-env start --slug=your-site
Once started, you’ll see the local site URL, login credentials, and an auto-login link. Save these for later.
Step 6: Import the Database
vip dev-env import sql /path/to/file.sql --slug=your-site
Replace /path/to/file.sql with the actual path to your SQL dump on your Mac.
Step 7: Import Media Files
vip dev-env import media /path/to/wp-content/uploads --slug=your-site
Replace /path/to/wp-content/uploads with the path to the uploads folder on your Mac. The folder should contain year-numbered subfolders (2023/, 2024/, etc.).
Done
Your local copy of the VIP site is now running. Open the site URL shown after vip dev-env start and log in with the credentials provided.
Day-to-Day Useful Commands
Once your environment is set up, these are the commands you’ll use most often.
# List all your local environments
vip dev-env list

# Check status, URLs, and credentials
vip dev-env info --slug=your-site

# Start the environment
vip dev-env start --slug=your-site

# Stop the environment (frees up RAM and CPU)
vip dev-env stop --slug=your-site

# Run any WP-CLI command inside the container
vip dev-env exec --slug=your-site -- wp plugin list
vip dev-env exec --slug=your-site -- wp cache flush
vip dev-env exec --slug=your-site -- wp user list

# Create a new admin user
vip dev-env exec --slug=your-site -- wp user create yourname you@example.com --role=administrator

# Check site URL after import
vip dev-env exec --slug=your-site -- wp option get siteurl
vip dev-env exec --slug=your-site -- wp option get home

# Search and replace URLs in the database
vip dev-env exec --slug=your-site -- wp search-replace 'old-url' 'new-url' --skip-columns=guid

# Delete all manually imported media files (host path - faster)
rm -rf ~/.local/share/vip/dev-environment/your-site/uploads/*

# Delete all manually imported media files (container path - alternative)
vip dev-env exec --slug=your-site -- rm -rf /wp/wp-content/uploads/*

# Destroy the environment completely
vip dev-env destroy --slug=your-site

# Update tooling to the latest version
npm update -g @automattic/vip
For official documentation, visit docs.wpvip.com/vip-local-development-environment.
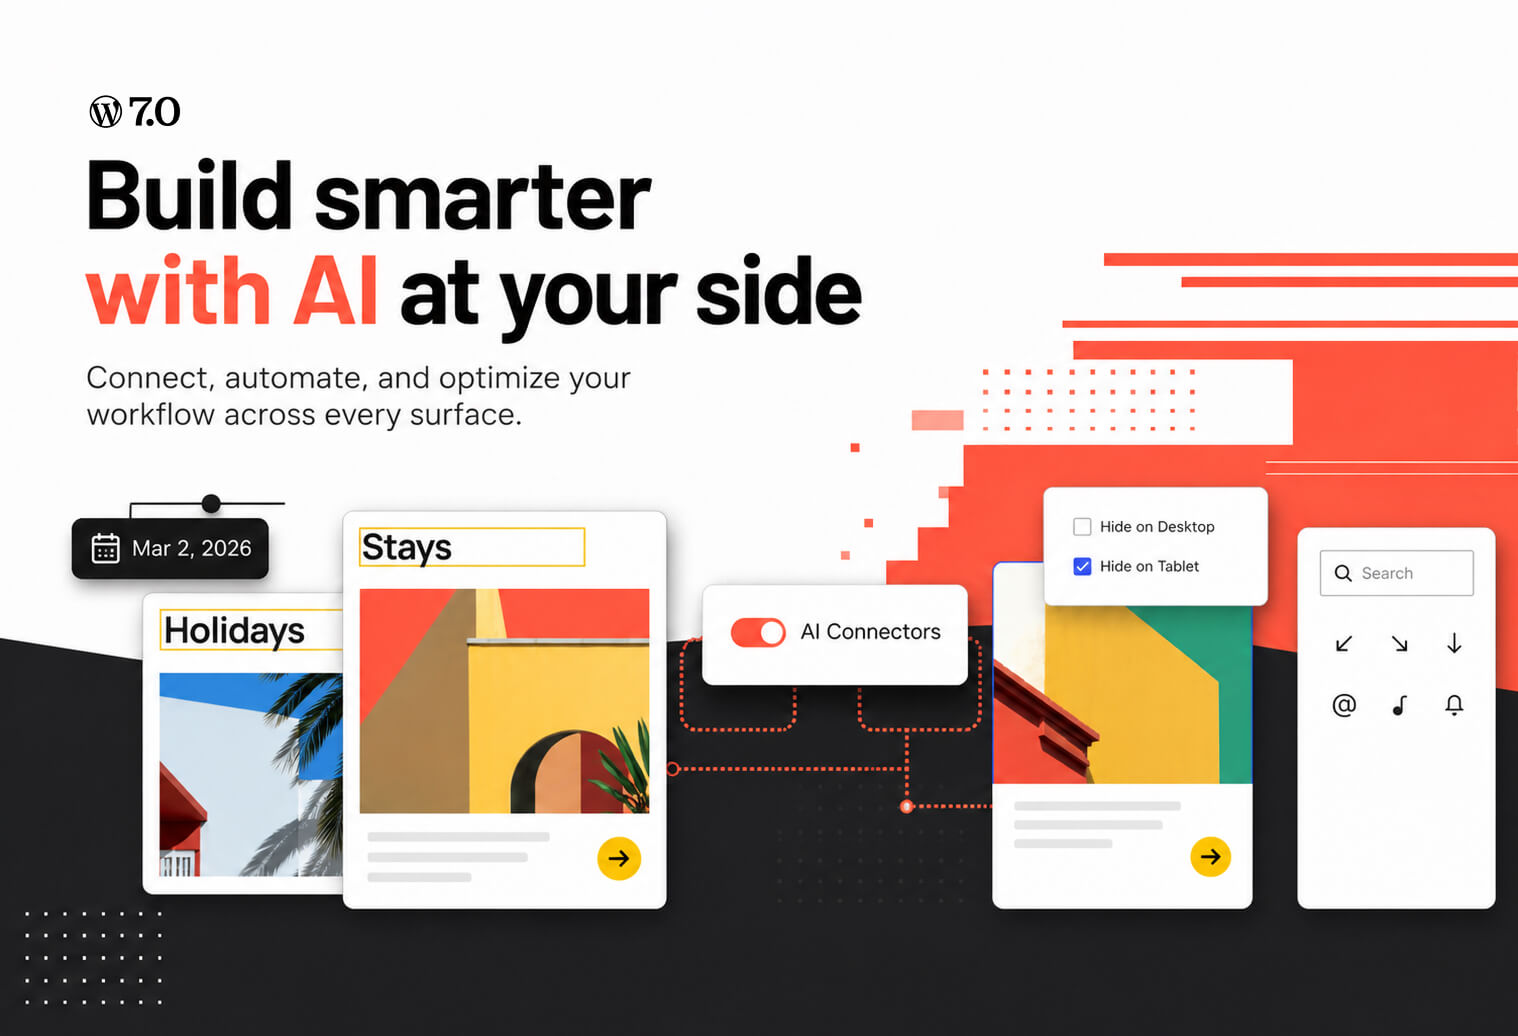
How WordPress is Preparing for the AI Era

We know WordPress is powerful, because of its thousands of plugins, APIs & functions but they are scattered. As a human we understand this ecosystem because we read docs to know how they works, features etc. But AI doesn’t work on this way. Because its not possible to know all the available WordPress plugins working procedure top to bottom. So the WordPress core AI team is taking a much smarter approach to use AI within the WordPress project. This approach is called AI Building Blocks for WordPress. The goal of the AI Building Blocks is Simple: Give AI a clear, secure, and standardized way to understand what WordPress can do and to do it safely.
They are working on the three core technologies that work together:
- PHP AI Client SDK & WordPress AI Client
- Abilities API
- MCP Adapter
PHP AI Client SDK:
Currently there are many AI providers (OpenAI, Anthropic, Gemini, etc.) in the market and each has its own API & configurations process. If a developer want to enable AI features to their own plugins they need to implement the API integration from scratch. Also the developers need to implement each providers separately for their plugins. Developers rebuilds the same infrastructure: provider integrations, API key management. Admin enter the same credentials multiple time and multiple places for each separate plugins.
On the other hand, the PHP AI Client SDK creates one unified PHP interface that works with multiple AI models. To use the SDK everything will be centralizes, one credentials system for all plugins. The WordPress site admins choose which AI services they want to configure & use from a single place. So, developers can focus on building AI features, not AI infrastructure. Developers don’t lock themselves into a single AI provider.
WordPress AI Client:
An AI client and API for WordPress to communicate with any generative AI models of various capabilities using a uniform API. Built on top of the PHP AI Client, adapted for the WordPress ecosystem while following WordPress Coding Standards and best practices. Features of the WordPress AI Client:
- WP Prompt Builder – A WordPress-friendly way to create and manage AI prompts using PHP, following WordPress coding standards.
- Admin Settings Page – A WordPress Admin settings screen to store AI provider API keys.
- Auto API Key Setup – Automatically uses API keys saved in WordPress settings.
- Standard HTTP Client – Uses the WordPress HTTP API in a PSR-compatible way.
- JavaScript API – Front-end JS prompt builder that talks with the server through the WP REST APIs.
Abilities API:
A typical WordPress website might could have lots of plugins installed & activated, each introducing unique functionality. But there’s no standardized way for these components to express their capabilities. An AI assistant has no systematic way to discover that. To solve this problem, the Abilities API establishes a standardized format for registering the capabilities of plugins and themes in a common structure, something like below:
- What the plugin or feature does.
- What inputs it needs.
- What output it returns.
- Which permission require to run it.
This makes it easier for AI to automatically discover WordPress features. It transforms WordPress from an isolated collection of functionalities and plugins into an interconnected, discoverable system.
MCP Adapter:
Once WordPress knows its own abilities by Abilities API, the next step is letting AI assistants use them. That’s the job of the MCP Adapter.
MCP (Model Context Protocol) is an open standard that defines how applications expose tools to AI models. The MCP Adapter translates WordPress abilities into a format that AI assistants like ChatGPT, Claude or Gemini can understand. AI assistants can discover, understand, and execute actions like creating posts, managing media, and moderating comments, all through the standardized protocol. So, Content creators can manage their WordPress sites conversationally, while developers can automate complex workflows across systems. Agencies can build sophisticated integrations, from content migration to performance optimization.
These three AI Building Blocks work together by the following way:
- PHP/WordPress AI Client SDK talks to AI models.
- Abilities API defines what WordPress can do.
- MCP Adapter exposes those abilities to AI assistants safely.
AI Experiments
If you want to experiments all the AI Building Blocks in one place then you can try AI Experiments Plugin. It serves as both a powerful tool for users and a reference implementation for developers, demonstrating how the PHP AI Client SDK, Abilities API, and MCP Adapter work together in practice.

How to Migrate Your Local WordPress Site to a Vito Web Panel Server
Follow this step-by-step guide to migrate your local WordPress website to a live server using the Vito Web Panel.
1. Add Your SSH Key to the Vito Server
First, generate an SSH key on your device and add it to the SSH Settings section inside the Vito server panel.
2. Create a WordPress Site in Vito
Create a new WordPress site from the Vito Web Panel.
For example, assume your live domain is:
wp-site.com
3. Connect to the Vito Server via SSH
Open your terminal and log in to your server using the following command:
ssh vito@{your.server.ip}
Once logged in, you will be at the server’s root directory.
To list your created websites, run:
ls or ls -la
4. Navigate to Your Website Directory
Enter your WordPress site directory:
cd wp-site.com
5. Remove the Existing wp-content Folder
Delete the default wp-content directory:
rm -rf wp-content
6. Prepare Your Local wp-content for Upload
Create a ZIP file of your local site’s wp-content folder.
Before uploading, open the folder in a code editor and perform a search & replace:
-
Replace all instances of:
local-wp-site.testwithwp-site.com -
Then replace:
http://wp-site.comwithhttps://wp-site.com
7. Upload the wp-content ZIP to the Server
Use SCP to upload the zipped folder to your server:
scp ~/Herd/local-wp-site/wp-content.zip vito@ {your.server.ip}:/home/vito/wp-site.com/
8. Unzip the Uploaded File
From your project root directory, unzip the file:
unzip wp-content.zip
Now your site files are ready.
9. Export Your Local Database
Run the following command to export your local database:
mysqldump -u root -p local_site_db > local_site_db.sql
10. Upload the Database to the Server
Upload the exported SQL file:
scp ~/Herd/local-wp-site/local_site_db.sql vito@ {your.server.ip}:/home/vito/
11. Import the Database Into the Live Server
Run the following command to import your SQL file into the live database:
mysql -u db_user_name -p wp_site_db < /home/vito/local_site_db.sql
You will be prompted for the database password. Enter it, and the import will proceed.
12. Update URLs Using WP-CLI
Navigate back to your project’s root directory and run the following WP-CLI commands:
wp search-replace 'local-wp-site.test' 'wp-test.com'
wp search-replace 'http://wp-test.com' 'https://wp-test.com'
This ensures all old local URLs are correctly replaced with the live domain URLs.
Your migration is now complete!
A Beginner’s Guide to Global State Management in WordPress Gutenberg
When building complex WordPress block editor (Gutenberg) applications, managing state efficiently becomes crucial. This is where @wordpress/data comes into play. It allows you to manage and share global state across different blocks and components in your WordPress application.
If you’re new to managing global state or using @wordpress/data, don’t worry! This blog post will walk you through the basics of reducers, actions, and selectors, explaining how to use them to manage state in WordPress.
@wordpress/data provides a way to store, update, and access data globally, allowing different components or blocks to share and interact with the same data.
Key Concepts in @wordpress/data
To understand how to use @wordpress/data, we need to understand three main concepts: reducers, actions, and selectors. These form the core of how state is managed and updated.
Actions:
An action is like an instruction or command that tells the reducer what to do. It’s simply an object that has two parts:
- A type that indicates what kind of change is happening (e.g., add, remove, update).
- A payload that contains the data needed for that change (e.g., which item to add).
Here’s an example of how actions might look in our cart example:
const actions = {
    addToCart(item) {
        return {
            type: 'ADD_TO_CART', // Action type
            item // Payload: the item to add to the cart
        };
    },
    removeFromCart(itemId) {
        return {
            type: 'REMOVE_FROM_CART', // Action type
            itemId // Payload: the ID of the item to remove
        };
    }
};
In short: Actions tell the reducer what needs to change in the state.
Reducers:
A reducer is like a manager of your state. Whenever something changes in your application (e.g., a user adds a block or disables a feature), the reducer listens for that change and updates the state accordingly.
What does a reducer do? It takes the current state and an action, then returns a new state based on the action.
Here’s an example of a simple reducer that manages a shopping cart:
const reducer = (state = { cart: [] }, action) => {
    switch (action.type) {
        case 'ADD_TO_CART':
            return {
                ...state, // Keep the existing state
                cart: [...state.cart, action.item] // Add the new item to the cart
            };
        case 'REMOVE_FROM_CART':
            return {
                ...state,
                cart: state.cart.filter((item) => item.id !== action.itemId) // Remove the item from the cart
            };
        default:
            return state; // Return the unchanged state for unknown actions
    }
};
In short: The reducer defines how the state changes when specific actions are dispatched.
Selectors:
A selector is a function that retrieves or selects specific data from the state. When your components need to access data (like displaying the items in the cart), they use a selector to fetch that data from the store.
For example, a selector to get all the cart items might look like this:
const selectors = {
    getCartItems(state) {
        return state.cart; // Return the cart items from the state
    }
};
In a component, you would use this selector to access the cart data like this:
const cartItems = useSelect((select) => select('my-store').getCartItems());
In short: A selector is a helper function that lets you access specific data from the state.
Step by Step Guide to Implement Global State in Gutenberg with @wordpress/data
Now that we’ve covered the basics, let’s walk through how you can implement these concepts in a Gutenberg block or component. We’ll set up a simple store with @wordpress/data, manage some state, and use actions and selectors to interact with that state.
Step 1: Define Your Initial State
First, we need to define the initial state of our store. This is the default data that our application starts with:
const DEFAULT_STATE = {
    cart: []
};
Step 2: Create Actions
Next, we define the actions that we will use to update the state. In our case, we’ll define two actions: one to add an item to the cart and another to remove an item.
const actions = {
    addToCart(item) {
        return {
            type: 'ADD_TO_CART',
            item
        };
    },
    removeFromCart(itemId) {
        return {
            type: 'REMOVE_FROM_CART',
            itemId
        };
    }
};
Step 3: Create the Reducer
The reducer listens for dispatched actions and updates the state accordingly. Here’s our reducer, which updates the cart when actions are dispatched:
const reducer = (state = DEFAULT_STATE, action) => {
    switch (action.type) {
        case 'ADD_TO_CART':
            return {
                ...state,
                cart: [...state.cart, action.item]
            };
        case 'REMOVE_FROM_CART':
            return {
                ...state,
                cart: state.cart.filter((item) => item.id !== action.itemId)
            };
        default:
            return state;
    }
};
Step 4: Create Selectors
Selectors help retrieve specific data from the state. For example, if we want to get all items in the cart, we would create a selector like this:
const selectors = {
    getCartItems(state) {
        return state.cart;
    }
};
Step 5: Create and Register the Store
Finally, we’ll create and register the store with the @wordpress/data package. This will make the store globally accessible across your WordPress site.
import { createReduxStore, register } from '@wordpress/data';

const store = createReduxStore('my-cart-store', {
    reducer,
    actions,
    selectors,
});

register(store);
Step 6: Using the Store in Components
Once the store is registered, you can use it in your Gutenberg blocks or components. For example, to add an item to the cart:
import { useDispatch } from '@wordpress/data';

const { addToCart } = useDispatch('my-cart-store');
addToCart({ id: 1, name: 'Sample Item' });
To fetch the items in the cart:
import { useSelect } from '@wordpress/data';

const cartItems = useSelect((select) => select('my-cart-store').getCartItems());
Conclusion
By understanding the roles of reducers, actions, and selectors, you can easily manage global state in your WordPress Gutenberg projects using @wordpress/data. This structured approach allows you to manage data more efficiently, making your blocks and components more powerful and interactive.
With @wordpress/data, you have a reliable and scalable solution for handling state across your entire WordPress application. Give it a try in your next Gutenberg project!
How to Implement a WooCommerce AJAX Direct “Buy Now” Button
When you’re running an online store using WooCommerce, making the purchasing process as seamless as possible is crucial. One effective way to do this is by adding a “Buy Now” button that allows customers to directly purchase a product without navigating through multiple pages. This blog will walk you through creating a WooCommerce AJAX “Buy Now” button using the provided code snippets.
Step 1: Add the “Buy Now” Button
First, you need to add a custom “Buy Now” button on your WooCommerce product pages. We’ll do this by hooking into the woocommerce_after_add_to_cart_button action, which places our button right after the standard “Add to Cart” button.
Here’s the PHP code snippet:
add_action( 'woocommerce_after_add_to_cart_button', 'add_content_after_addtocart' );
function add_content_after_addtocart() {
    $current_product_id = get_the_ID();
    $product = wc_get_product( $current_product_id );

    if( $product->is_type( 'simple' ) ){
        echo '<button data-id="'.$current_product_id.'" class="buy-now button"><i class="matico-icon-toys"></i>'.__('Buy Now', 'woocommerce').'</button>';
    }
}
Explanation:
- We use the
woocommerce_after_add_to_cart_buttonhook to insert our “Buy Now” button right after the “Add to Cart” button. - The
get_the_ID()function retrieves the current product ID, andwc_get_product()gets the product details. - We check if the product is of type simple and then render the button with the appropriate data-id attribute and a custom icon.
Step 3: Enqueue the Script
Next, you need to enqueue the script in your theme to ensure it’s loaded properly on your WooCommerce pages. Here’s how to do it:
wp_enqueue_script('matico-child-script', get_stylesheet_directory_uri() . '/assets/js/script.js', array( 'jquery', 'scrollfix-script' ),  $matico_version, true);

wp_localize_script( 'matico-child-script', 'matico_child_script_obj',
    array(
        'checkout_page_url' => wc_get_checkout_url(),
    )
);
Explanation:
-
wp_enqueue_script()is used to load our custom script file (script.js), which contains the jQuery code. -
wp_localize_script()passes PHP data to the script, such as the checkout page URL, allowing us to use it within the script.
Step 2: Handle the AJAX Request
Finally, we’ll handle the button click event using jQuery. The jQuery script sends an AJAX request to WooCommerce, which adds the product to the cart and then redirects the user directly to the checkout page.
Here’s the jQuery code snippet:
(function ($) {
    var MaticoChildThemeConfig = {
        init: function () {
            this.bindEvents();
        },
        bindEvents: function () {
            $(document).on('click', '.buy-now', this.handleBuyNowClick);
        },
        handleBuyNowClick: function (event) {
            event.preventDefault();

            var $button = $(this),
                quantity = parseFloat($button.closest('.quantity').find('.qty').val()) || 1,
                productID = $button.data('id');

            var data = {
                product_id: productID,
                quantity: quantity,
            };

            $.ajax({
                type: 'POST',
                url: wc_add_to_cart_params.wc_ajax_url.toString().replace('%%endpoint%%', 'add_to_cart'),
                data: data,
                dataType: 'json',
                beforeSend: function () {
                    $button.addClass('loading');
                },
                success: function (res) {
                    if (res.error && res.product_url) {
                        window.location.href = res.product_url;
                    } else {
                        window.location.href = matico_child_script_obj.checkout_page_url;
                    }
                }
            });
        }
    };

    MaticoChildThemeConfig.init();
})(jQuery);
Explanation:
- When the “Buy Now” button is clicked, we prevent the default action to avoid page reload.
- We gather the product ID and quantity from the current product page.
- An AJAX request is sent to WooCommerce’s add_to_cart endpoint, which adds the product to the cart.
- If the product is successfully added, we redirect the user to the checkout page. If there’s an error (e.g., the product is no longer available), the user is redirected to the product page.
Conclusion
By implementing the above steps, you can create a “Buy Now” button that streamlines the purchasing process for your customers. This feature is particularly useful in boosting conversions by reducing the number of clicks and pages a customer needs to navigate before completing a purchase.
মাতৃভাষা বাংলায় সিএসএস ফ্লেক্সবক্স

আপনি যদি সিএসএস এ নতুন হন এবং যদি পিওর সিএসএস ব্যবহার করে সুন্দর সুন্দর ফ্লেক্সিবল লেআউট তৈরি করতে চান তাহলে সিএসএস ফ্লেক্সবক্স সম্পর্কে পরিষ্কার ধারনা রাখাটা আপনার জন্য খুবই জরুরী। এমনকি জনপ্রিয় সিএসএস ফ্রেমওয়ার্ক গুলো যেমনঃ Bootstrap লেআউট গ্রিড সিস্টেম ফ্লেক্সবক্স এর মাধ্যমে হ্যান্ডেল করে এছাড়াও আপনি যদি Tailwind সিএসএস নিয়েও কাজ করতে চান তাহলেও ফ্লেক্সবক্স জানা থাকাটা জরুরী। আমি এই আর্টিকেলটিতে চেষ্টা করব সিএসএস ৩.০ এর এই গুরুত্বপূর্ণ ডিসপ্লে প্রপার্টি ফ্লেক্সবক্স সম্পর্কে খুব সহজে পূর্ণাঙ্গ ধারনা দেয়ার। তাহলে চলুন শুরু করা যাক।
সংক্ষেপে ফ্লেক্সবক্সঃ
সিএসএস ফ্লেক্সবক্স হল একটি ফ্লেক্সিবল ডিসপ্লে প্রপার্টি। ফ্লেক্সবক্স এর সাহায্যে আমরা খুব সহজে একটি কন্টেইনার এর মধ্যে থাকা আইটেম গুলোকে x-axis অথবা y-axis বরাবর layout, space এবং alignment ঠিক করতে পারি।
যে এলেমেন্ট এর ওপর display:flex প্রপার্টি অ্যাপ্লাই করা হয় সেটাকে ফ্লেক্স কন্টেইনার বলে এবং ফ্লেক্স কন্টেইনার এর মধ্যে যে আইটেম গুলো থাকে সেগুলোকে ফ্লেক্স আইটেম বলে।
একটি ফ্লেক্স কন্টেইনার এর দুইটি অক্ষ থাকে একটি হচ্ছে মেইন বা প্রধান অক্ষ এবং আরেকটি হচ্ছে ক্রস অক্ষ। এক নজরে একটি চিত্রের সাহায্যে ফ্লেক্স লেআউট দেখে নেয়া যাক।

ফ্লেক্সবক্স কন্টেইনার বিস্তারিতঃ
কোন একটি এইচটিএমএল এলেমেন্ট কে display:flex প্রপার্টি বলে দিলেই এটি ফ্লেক্স কন্টেইনার হয়ে যায় এবং ফ্লেক্স কন্টেইনার এর সরাসরি চাইল্ড এলেমেন্ট গুলো ফ্লেক্স আইটেম হয়ে যায়। সাথে সাথে ফ্লেক্স আইটেম গুলো বাম দিক থেকে ডান দিক বরাবর অবস্থান করে।
.container{
        display: flex;
}
ফ্লেক্স কন্টেইনার বোঝার জন্য নিচের চিত্র টি দেখুন।

flex-direction:
ফ্লেক্স আইটেম গুলোকে x-axis অথবা y-axis বরাবর অগ্রসর করানোর জন্য flex-direction প্রপার্টি ব্যবহার করা হয়। flex-direction প্রপার্টির ৪ ধরনের মান ব্যবহার করা যায়। এগুলো হল নিম্নরূপ।
.container{
        display: flex;
        flex-direction: row || row-reverse || column || column-reverse;
}

- flex-direction: row; ফ্লেক্স আইটেম গুলো বাম থেকে ডানে অবস্থান করবে।
- flex-direction: row-reverse; ফ্লেক্স আইটেম গুলো ডান থেকে বামে অবস্থান করবে।
- flex-direction: column; ফ্লেক্স আইটেম গুলো উপর থেকে নিচে y-axis বরাবর অবস্থান করবে।
- flex-direction: column-reverse; ফ্লেক্স আইটেম গুলো নিচে থেকে উপরে y-axis বরাবর অবস্থান করবে।
flex-wrap:
বাই ডিফল্ট ফ্লেক্স আইটেম গুলো nowrap করা থাকে যে কারণে আইটেম গুলো একটি লাইনে দেখায়। এটির একটা সমস্যা হল ডিভাইস উইড্থ ছোট হলে যে কয়েকটা আইটেম ডিভাইস এ দেখানো সম্ভব সেগুলো দেখাবে এবং অন্য আইটেম গুলোকে শেষের দিক থেকে দেখা যাবে না কারণ সেগুলো overflow হয়ে যাবে। flex-wrap ব্যবহার করে খুব সহজেই এই বেহেভিওর পরিবর্তন করা যায়। flex-wrap প্রপার্টির ৩ ধরনের মান ব্যবহার করা যায়। এগুলো হল নিম্নরূপ।
.container{
        display: flex;
        flex-wrap: nowrap || wrap || wrap-reverse;
}

- flex-wrap: nowrap; সকল ফ্লেক্স আইটেম গুলো একটি লাইন এ অবস্থান করবে।
- flex-wrap: wrap; প্রয়োজন অনুসারে ফ্লেক্স আইটেম গুলো উপর থেকে নিচে wrap হবে (এটি ডিভাইস উইড্থ এর সাথে রেস্পন্সিভলি পরিবর্তন হয়)।
- flex-wrap: wrap-reverse; প্রয়োজন অনুসারে ফ্লেক্স আইটেম গুলো বিপরীত ভাবে wrap হবে (এটি ডিভাইস উইড্থ এর সাথে রেস্পন্সিভলি পরিবর্তন হয়)।
flex-flow:
flex-direction এবং flex-wrap এর শর্টহ্যান্ড হল flex-flow। প্রথমে লিখতে হবে flex-direction এবং পরে লিখতে হবে flex-wrap প্রপার্টি। flex-flow এর ডিফল্ট মান হলঃ flex-flow: row nowrap;
.container{
        display: flex;
        flex-flow: row wrap;
}
justify-content:
justify-content ব্যবহার করে ফ্লেক্স আইটেম গুলোকে প্রধান অক্ষ বরাবর সাজানো যায়। justify-content প্রপার্টির ৬ ধরনের মান ব্যবহার করা যায়। এগুলো হল নিম্নরূপ।
.container{
        display: flex;
        justify-content: flex-start || flex-end || center || space-between || space-around || space-evenly;
}

- justify-content: flex-start; ফ্লেক্স আইটেম গুলো কন্টেইনার এর শুরু থেকে অবস্থান করবে।
- justify-content: flex-end; ফ্লেক্স আইটেম গুলো কন্টেইনার এর শেষে থেকে অবস্থান করবে।
- justify-content: center; ফ্লেক্স আইটেম গুলো কন্টেইনার এর কেন্দ্রে অবস্থান করবে।
- justify-content: space-between; প্রথম ফ্লেক্স আইটেম একদম কন্টেইনার এর শুরুতে থাকবে এবং শেষ ফ্লেক্স আইটেম একদম কন্টেইনার এর শেষে থাকবে, মাঝের আইটেম গুলো নিজেদের আগে ও পরে সমান জায়গা নিয়ে অবস্থান করবে বা ছড়িয়ে যাবে।
- justify-content: space-around; ফ্লেক্স আইটেম নিজেদের আগে ও পরে সমান জায়গা নিয়ে ছড়িয়ে যাবে। এক্ষেত্রে প্রথম আইটেম এর শুরুতে এবং শেষ আইটেম এর পরের ফাঁকা জায়গা এবং আইটেম গুলোর মাঝে ফাঁকা জায়গা সমান হয় না।
- justify-content: space-evenly; সবগুলো ফ্লেক্স আইটেম এর আগে ও পরে সমান জায়গা থাকে। কন্টেইনার এর মোট ফাঁকা জায়গা আইটেম এর আগে ও পরে সমান ভাবে থাকে।
align-items:
ফ্লেক্স কন্টেইনার এর প্রত্যেকটা লাইন এর আইটেম গুলোকে উপর থেকে নিচে বরাবর align করার জন্য align-items প্রপার্টি ব্যবহার করা হয়। align-items প্রপার্টির ৫ ধরনের মান ব্যবহার করা যায়। এগুলো হল নিম্নরূপ।
.container{
        display: flex;
        align-items: flex-start || stretch || flex-end || center || baseline;
}

- align-items: flex-start; ফ্লেক্স আইটেম গুলো প্রত্যেক লাইনের উপড়ে অবস্থান করবে।
- align-items: stretch; একটি ফ্লেক্স কন্টেইনার এর মধ্যে যদি একটি লাইনেয় আইটেম থাকে তাহলে আইটেম গুলো পুরো কন্টেইনার এর উচ্চতা টাই নিবে আর দুই লাইন এ আইটেম থাকলে পুরো কন্টেইনার এর উচ্চতা এর অর্ধেক জায়গা নিবে।
- align-items: flex-end; ফ্লেক্স আইটেম গুলো প্রত্যেক লাইনের নিচে অবস্থান করবে।
- align-items: center; ফ্লেক্স আইটেম গুলো প্রত্যেক লাইনের উপর থেকে নিচ বরাবর কেন্দ্রে অবস্থান করবে।
- align-items: baseline; ফ্লেক্স আইটেম গুলো তাদের baseline অনুসারে align হবে।
align-content:
ফ্লেক্স কন্টেইনার এর প্রত্যেকটা লাইনকে আলাদা আলাদা ভাবে চিন্তা না করে একটি কন্টেন্ট হিসাবে চিন্তা করে ক্রস আক্সিস বরাবর align করার জন্য align-content ব্যবহার করা হয়। এটি অনেকটা justify-content এর মত বলতে পারেন। justify-content মেইন আক্সিস বরাবর কাজ করে অপরদিকে align-content ক্রস আক্সিস বরাবর কাজ করে। align-content প্রপার্টির ৭ ধরনের মান ব্যবহার করা যায়। এগুলো হল নিম্নরূপ।
.container{
        display: flex;
        align-content: flex-start || flex-end || center || stretch || space-between || space-around || space-evenly;
}

- align-content: flex-start; ক্রস আক্সিস বরাবর সকল ফ্লেক্স আইটেম গুলো কন্টেইনার এর শুরু থেকে অবস্থান করবে।
- align-content: flex-end; ক্রস আক্সিস বরাবর সকল ফ্লেক্স আইটেম গুলো কন্টেইনার এর শেষে থেকে অবস্থান করবে।
- align-content: center; ক্রস আক্সিস বরাবর সকল ফ্লেক্স আইটেম গুলো কন্টেইনার এর কেন্দ্রে অবস্থান করবে।
- align-content: stretch; ক্রস আক্সিস বরাবর সকল ফ্লেক্স আইটেম গুলো stretch হয়ে যায়।
- align-content: space-between; ক্রস আক্সিস বরাবর প্রথম ফ্লেক্স আইটেম একদম কন্টেইনার এর শুরুতে থাকবে এবং শেষ ফ্লেক্স আইটেম একদম কন্টেইনার এর শেষে থাকবে, মাঝের আইটেম গুলো নিজেদের আগে ও পরে সমান জায়গা নিয়ে অবস্থান করবে বা ছড়িয়ে যাবে।
- align-content: space-around; ক্রস আক্সিস বরাবর ফ্লেক্স আইটেম নিজেদের আগে ও পরে সমান জায়গা নিয়ে ছড়িয়ে যাবে। এক্ষেত্রে প্রথম আইটেম এর শুরুতে এবং শেষ আইটেম এর পরের ফাঁকা জায়গা এবং আইটেম গুলোর মাঝে ফাঁকা জায়গা সমান হয় না।
- align-content: space-evenly; ক্রস আক্সিস বরাবর সবগুলো ফ্লেক্স আইটেম এর আগে ও পরে সমান জায়গা থাকে। কন্টেইনার এর মোট ফাঁকা জায়গা আইটেম এর আগে ও পরে সমান ভাবে থাকে।
gap, row-gap, column-gap:
ফ্লেক্স আইটেম গুলোর মধ্যে ফাঁকা জায়গা রাখার জন্য gap প্রপার্টি ব্যবহার করা হয়।
ফ্লেক্স আইটেম গুলোর মধ্যে মেইন আক্সিস বরাবর ফাঁকা জায়গা রাখার জন্য row-gap প্রপার্টি ব্যবহার করা হয়।
ফ্লেক্স আইটেম গুলোর মধ্যে ক্রস আক্সিস বরাবর ফাঁকা জায়গা রাখার জন্য column-gap প্রপার্টি ব্যবহার করা হয়।
.container{
        display: flex;
        gap: 24px;
          /* gap: 24px 30px; */ /* row-gap column-gap */
          /* row-gap: 24px; */
          /* column-gap: 24px; */
}
ফ্লেক্সবক্স আইটেম বিস্তারিতঃ
ফ্লেক্স কন্টেইনার এর সরাসরি চাইল্ড এলেমেন্ট গুলোই ফ্লেক্স আইটেম।

order:
ফ্লেক্স আইটেম গুলোর ডিফল্ট অর্ডার হিসাবে ০ থাকে। এইচটিএমএল কোড অনুযায়ী আইটেম গুলোর অর্ডার থাকে কিন্তু আলাদা করে কোন একটি আইটেম এর অর্ডার এর মান নির্ধারণ করে দিলে সেই অর্ডার অনুযায়ী আইটেম গুলো অবস্থান করবে।
.container{
        display: flex;
}
/* অর্ডার পরিবর্তন করার কোড */
.item{
        order: 2;
}
.item-1{
        order: 1;
}

flex-grow:
মেইন আক্সিস বরাবর একটি লাইনে যতগুলো আইটেম থাকে সেই আইটেম গুলো ছাড়া যদি কোন ফাঁকা জায়গা থাকে তাহলে সেই ফাঁকা জায়গা সবগুলো আইটেম এর মধ্যে সমান ভাবে ছড়িয়ে দেওয়া অথবা কোন একটি নির্দিষ্ট আইটেম এর মধ্যে ছড়িয়ে দেওয়ার জন্য flex-grow ব্যবহার হয়। সবগুলো আইটেম এর মধ্যে ফাঁকা জায়গা সমানভাবে ছড়িয়ে দেওয়ার জন্য সবগুলো আইটেম কে flex-grow: 1; দিতে হয়। এক্ষেত্রে আইটেম গুলোর উইড্থ নির্ধারণ করা থাকলেও যখন ফাঁকা জায়গা পাবে সেই ফাঁকা যায়গা নিজেদের মধ্যে নিয়ে নিবে এবং সমান ভাবে আকৃতি পরিবর্তন করবে। অথবা কোন একটি নির্দিষ্ট আইটেম কে টার্গেট করেও flex-grow অ্যাপ্লাই করা যায়। ডিফল্ট flex-grow এর মান থাকে ০।
        display: flex;
}
.item-3{
        flex-grow: 1;
}

flex-shrink:
flex-shrink ঠিক flex-grow এর উল্টো। ব্রাউজার উইন্ডো ছোট করার সাথে সাথে আইটেম গুলো shrink করবে কিনা সেটা নির্ভর করে flex-shrink এর উপর। ডিফল্ট মান থাকে ১ যার কারণে আইটেম গুলো shrink করে কিন্তু shrink এর মান ০ করে দিলে রেস্পন্সিভনেস থাকবে না এবং আইটেম গুলো ব্রাউজার উইন্ডো এর বাহিরে চলে যাবে।
.item-1 {
  flex-shrink: 0; /* ডিফল্ট 1 */
}
flex-basis:
flex-basis হল কোন একটি আইটেম এর মিনিমাম কত উইড্থ হবে সেইটা নির্ধারণ করে দেওয়া। এটা অনেকটা min-width প্রপার্টি এর মত কিন্তু flex-basis এর সবচেয়ে বড় সুবিধা হল ব্রাউজার উইন্ডো উইড্থ যদি আইটেম গুলোর flex-basis এর মোট মানের তুলনায় ছোট হয় তাহলে আইটেম overflow না হয়ে রেস্পন্সিভলি উইড্থ টা কমিয়ে নিবে।
.item {
  flex-basis: 500px; /* ডিফল্ট auto */
}
flex:
flex-grow, flex-shrink এবং flex-basis একসাথে লেখার জন্য আমরা flex শর্টহ্যান্ড টা ব্যবহার করতে পারি।
.item {
  flex: flex-grow flex-shrink flex-basis;
}
align-self:
align-self প্রপার্টি ব্যবহার করে কোন একটা নির্দিষ্ট ফ্লেক্স আইটেম এর ডিফল্ট এলাইনমেন্ট ওভাররাইড করা যায়। align-items এর মতো align-self এ একয় রকম মান (stretch, center, flex-start, flex-end, baseline) ব্যবহার করা যায় এবং একই লজিক এ কাজ করে। তবে align-self এর ডিফল্ট মান হল auto।
.item-2 {
  align-self: auto || flex-start || flex-end || center || baseline || stretch;
}

ডেভেলপারদের নিত্যদিনের সঙ্গী মার্কডাউন

আপনি যদি একজন ডেভেলপার হয়ে থাকেন তাহলে নিশ্চয়ই আপনি জানে যে, গিট বা গিটহাব কি জিনিস। সংক্ষেপে এটা একটি ভার্সন কন্ট্রোলিং সিস্টেম। যখন আমরা কোন প্রোজেক্ট গিটহাবে ভার্সন কন্ট্রোল করি তখন প্রত্যেকটা রিপোজিটোরিতে একটা কমন ফাইল থাকে যার নাম README.md। README.md ফাইলে মূলত প্রোজেক্ট এর একটা সংক্ষিপ্ত বিবরণ থাকে, যেমনঃ প্রোজেক্ট কেন করা হয়েছে, কি কি টেকনোলজি ব্যবহার করা হয়েছে, কিভাবে ইন্সটল করতে হবে, ডেমো লিঙ্ক ইত্যাদি। আর এগুলোকে যদি আপনি নিজের মত করে ফরম্যাটিং করতে চান যেমনঃ টাইটেল বানানো, লেখা বোল্ড করা, লিঙ্ক করা, ইমেজ দেখানো ইত্যাদি, তাহলে আপনাকে অবশ্যই মার্কডাউন সম্পর্কে জানতে হবে।
আবার আপনি যদি আপনার গিটহাব প্রোফাইল পেইজ টা পিন করা রিপোজিটোরির পরিবর্তে সুন্দর করে উপস্থাপন করতে চান, সুন্দর একটা প্রোফাইল রিডমি তৈরি করতে চান তাহলে আপনাকে অবশ্যই মার্কডাউন ভালো ভাবে জানতে হবে। তাহলে চলুন দেরি না করে আমরা মার্কডাউন শেখা শুরু করি।
মার্কডাউন কিঃ
মার্কডাউন হল একটি লাইটওয়েট মার্কআপ ল্যাঙ্গুয়েজ যার মাধ্যমে লেখাকে ফরম্যাটিং করা হয়। বর্তমান সময়ে এটি খুবই জনপ্রিয় মার্কআপ ল্যাঙ্গুয়েজ।
জনপ্রিয় ওয়েবসাইট যেমনঃ GitHub, Reddit, Dev.to মার্কডাউন সাপোর্ট করে। গিটহাব সম্পর্কে আমি ইতিমধ্যে বলেছি। Dev.to হল ডেভেলপার কমিউনিটি, এখানে আপনি চাইলেই টেক ব্লগ লিখতে পারেন তবে আপনাকে এখানে লেখার জন্য মার্কডাউন জানা থাকলে আপনার খুবই সুবিধা হবে। আরেকটা বিষয় না বললেই নয় সেইটা হলঃ আপনি এখন যে প্লাটফর্ম এ লেখাটি পড়ছেন, হা আপনি ঠিক ধরেছেন আমি টেকডাইরির কথা বলছি এখানে ব্লগ লেখার জন্য যে এডিটর ব্যবহার করা হয়েছে এটিও মার্কডাউন সাপোর্ট করে আর আমি এখন এই সুবিধাটি ব্যবহার করেই লিখছি 😊।
কেন মার্কডাউন ব্যবহার করবেন?
WYSIWYG এডিটর এর পরিবর্তে মার্কডাউন সাপোর্ট করে এমন এডিটর ব্যবহার দিন দিন বেড়েই যাচ্ছে। আপনি হয়তো ভাবছেন কেন সবাই WYSIWYG এডিটর এর পরিবর্তে মার্কডাউন ব্যবহার করে, এটার বেশ কিছু কারণ রয়েছে। চলুন আমরা কারণগুলো দেখিঃ
- মার্কডাউন এখন প্রায় সব জায়গাই ব্যাবহৃত হচ্ছে। মার্কডাউন ব্যবহার করে অনেক কিছু তৈরি করা হচ্ছে যেমনঃ ওয়েবসাইট, ডকুমেন্ট, নোট, বই, প্রেজেন্টেশান, ইমেইল মেসেজ এবং টেক ডকুমেন্ট।
- মার্কডাউন পোর্টেবল এবং মার্কডাউনে ফরম্যাট করা টেক্সট ভার্চুয়ালি যেকোনো অ্যাপ্লিকেশানে ওপেন করা যায়।
- আপনি যেকোনো ডিভাইসে অথবা অপারেটিং সিস্টেমে মার্কডাউন তৈরি করতে পারবেন।
- আপনি ভবিষ্যতে যদি এমন সিদ্ধান্ত নেন যে মার্কডাউন ব্যবহার করবেন না তার পরও আপনি যেকোনো টেক্সট এডিটর অ্যাপ্লিকেশান ব্যবহার করে মার্কডাউনে ফরম্যাট করা টেক্সট পড়তে পারবেন খুব সহজে।
আরেকটি মজার বিষয় যে, এইচটিএমএল এর কোড মার্কডাউনে কাজ করে । এতো এতো সুবিধা আসলে মার্কডাউনের জনপ্রিয়তা দিন দিন বাড়িয়ে দিয়েছে বা এখনো দিচ্ছে।
মার্কডাউন কিভাবে কাজ করে?

মার্কডাউন নিম্নক্ত ৪টি ধাপে কাজ করেঃ
- প্রথমে মার্কডাউন ফাইল তৈরি করতে হবে। ফাইল ফরম্যাট হবে
.md। - মার্কডাউন ফাইলটিকে মার্কডাউন অ্যাপ্লিকেশানে ওপেন করতে হবে।
- মার্কডাউন অ্যাপ্লিকেশান মার্কডাউন ফাইলটিকে প্রসেস করে এইচটিএমএল ফাইলে কনভার্ট করবে।
- তারপর আমরা ফাইলটিকে ব্রাউজার এ দেখতে পাবো।
তবে চিন্তার কোন কারণ নেই আমাদেরকে এত গুলো প্রসেসের মধ্যে দিয়ে যেতে হবে না। আমি এখানে মার্কডাউন লেখার জন্য Dillinger এডিটর ব্যবহার করবো। Dillinger এডিটর ব্যবহার করে আপনি একপাশে মার্কডাউন কোড লিখবেন এবং অপরপাশে আউটপুট দেখতে পাবেন। আপনি চাইলে Visual Studio Code এডিটর ব্যবহার করে মার্কডাউন কোড লিখতে পারেন।
মার্কডাউন বিস্তারিতঃ
চলুন জেনে নেয়া যাক কিভাবে মার্কডাউন ব্যবহার করে টেক্সট ফরম্যাট করা যায়।
হেডিংঃ
আশা করি এইচটিএমএল হেডিং ট্যাগ সম্পর্কে আপনারা কমবেশি সবাই জানেন। এইচটিএমএল ফাইলে হেড ট্যাগ গুলো ব্যবহার করে আমরা টাইটেল তৈরি করতে পারি। এইচটিএমএলে আমরা H1 থেকে H6 (ক্রমান্বয়ে বড় থেকে ছোট) পর্যন্ত ৬টা ট্যাগ পাই টাইটেল লেখার জন্য। মার্কডাউন ব্যবহার করেও আমরা এইচটিএমএল এর মত হেডিং লিখতে পারি আরও সহজে। উদাহরণ সরূপ নিম্নের চিত্রটি দেখুন।

লেখা বোল্ড বা মোটা করাঃ
মার্কডাউন ব্যবহার করে কোন লেখাকে বোল্ড বা মোটা করার জন্য লেখাটির আগে ও পরে ফাঁকা জায়গা ব্যাতিত ২টা করে এস্টেরিস্ক বা স্টার (**) চিহ্ন দিতে হবে। উদাহরণ সরূপ নিম্নের চিত্রটি দেখুন।

লেখা ইটালিক করাঃ
মার্কডাউন ব্যবহার করে কোন লেখাকে ইটালিক করার জন্য লেখাটির আগে ও পরে ফাঁকা জায়গা ব্যাতিত ১টা করে এস্টেরিস্ক বা স্টার (*) চিহ্ন দিতে হবে। উদাহরণ সরূপ নিম্নের চিত্রটি দেখুন।

লেখা Blockquote করাঃ
মার্কডাউন ব্যবহার করে খুব সহজে Blockquote তৈরি করা যায়। কোন লেখাকে মার্কডাউন ব্যবহার করে Blockquote করার জন্য লেখাটির আগে > এই সাইন তা দিতে হয়। উদাহরণ সরূপ নিম্নের চিত্রটি দেখুন।

অর্ডার লিস্ট তৈরি করাঃ
মার্কডাউন ব্যবহার করে খুব সহজে আমরা অর্ডার লিস্ট তৈরি করতে পারি। অর্ডার লিস্ট তৈরি করার জন্য প্রত্যেক লাইন এর শুরুতে নাম্বার দিতে হবে। নাম্বার ক্রমানুসারে না হলেও চলবে কিন্তু শুরুটা এক নম্বর দিয়ে হওয়া উচিত। উদাহরণ সরূপ নিম্নের চিত্রটি দেখুন।

আনঅর্ডার লিস্ট তৈরি করাঃ
মার্কডাউন ব্যবহার করে খুব সহজে আমরা আনঅর্ডার লিস্ট তৈরি করতে পারি। আনঅর্ডার লিস্ট তৈরি করার জন্য প্রত্যেক লাইন এর শুরুতে একটি ড্যাশ (-), এস্টেরিস্ক (*), অথবা প্লাস সাইন (+) দিলেই হবে। উদাহরণ সরূপ নিম্নের চিত্রটি দেখুন।

হরাইজন্টাল রুল তৈরি করাঃ
মার্কডাউন ব্যবহার করে হরাইজন্টাল রুল তৈরি করার জন্য ৩ বা ৩ এর অধিক ড্যাশ (—), এস্টেরিস্ক (***), অথবা আন্ডারস্কোর সাইন (___) দিলেই হবে। উদাহরণ সরূপ নিম্নের চিত্রটি দেখুন।

লিঙ্ক তৈরি করাঃ
মার্কডাউন ব্যবহার করে লিঙ্ক তৈরি করা খুবই সহজ। লিঙ্ক তৈরি করার জন্য তৃতীয় ব্রাকেট এর মধ্যে টেক্সট লিখতে হবে এবং প্রথম ব্রাকেটের মধ্যে URL লিখতে হবে। উদাহরণ সরূপ নিম্নের চিত্রটি দেখুন।

ইমেজঃ
মার্কডাউনে ইমেজ ব্যবহার করা খুবই সহজ। এজন্য আমাদেরকে প্রথমে এক্সক্লামেশন মার্ক দিতে হবে, তারপর তৃতীয় ব্রাকেট এর মধ্যে ইমেজ অল্টার টেক্সট লিখতে হবে এবং প্রথম ব্রাকেটের মধ্যে ইমেজ URL লিখতে হবে। উদাহরণ সরূপ নিম্নের চিত্রটি দেখুন।

এক লাইনে কোড লেখাঃ
মার্কডাউন ব্যবহার করে কোন টেক্সট কে একই লাইন এ কোড হিসাবে দেখানোর জন্য লেখাটির আগে ও পরে ব্যাকটিক (`) দিতে হবে। উদাহরণ সরূপ নিম্নের চিত্রটি দেখুন।

কোড ব্লক তৈরি করাঃ
মার্কডাউন ব্যবহার করে কোড ব্লক তৈরি করার জন্য কোডের শুরুতে ৩টা ব্যাকটিক (`) অথবা ৩টা টিলড (~~~) এবং কোড এর শেষে ৩টা ব্যাকটিক () অথবা ৩টা টিলড (~~~) দিতে হয়। আপনি চাইলে প্রোগ্রামিং ল্যাঙ্গুয়েজ সিনট্যাক্স হাইলাইট ফিচার চালু করতে পারেন। এই জন্য আপনাকে শুরুর দিক থেকে ৩টা ব্যাকটিক (“) অথবা ৩টা টিলড (~~~) এর পরে ল্যাঙ্গুয়েজ এর নাম লিখে দিতে হবে। উদাহরণ সরূপ নিম্নের চিত্রটি দেখুন।

টেবিল তৈরি করাঃ
মার্কডাউন ব্যবহার করে টেবিল তৈরি করা যায় খুব সহজে। টেবিলের প্রত্যেক কলামের হেডার তৈরি করার জন্য ৩ বা ৩ এর অধিক হাইফেন (—) দিতে হবে। প্রত্যেক কলাম আলাদা করার জন্য একটা পাইপ (|) চিহ্ন দিতে হবে। উদাহরণ সরূপ নিম্নের চিত্রটি দেখুন।

স্ট্রাইকথ্রুঃ
মার্কডাউন ব্যবহার করে স্ট্রাইকথ্রু তৈরি করার জন্য লেখার শুরু এবং শেষে ২টা টিলড (~~) দিতে হবে। উদাহরণ সরূপ নিম্নের চিত্রটি দেখুন।

টাস্ক লিস্ট তৈরি করাঃ
মার্কডাউন ব্যবহার করে টাস্ক লিস্ট তৈরি করার জন্য লাইনের শুরুতে তৃতীয় ব্র্যাকেট এর মধ্যে ফাঁকা জায়গা রাখলে টাস্কটি আনচেক দেখাবে এবং চেক করা দেখাতে চাইলে তৃতীয় ব্র্যাকেট এর মধ্যে x লিখতে হবে। উদাহরণ সরূপ নিম্নের চিত্রটি দেখুন।

হাইলাইট টেক্সটঃ
মার্কডাউন ব্যবহার করে হাইলাইট টেক্সট করার জন্য টেক্সট এর শুরু এবং শেষে ২টা (==) সমান চিহ্ন দিতে হবে। উদাহরণ সরূপ নিম্নের চিত্রটি দেখুন।

ইমোজিঃ
আপনি যদি মার্কডাউন ব্যবহার করতে চান তাহলে আপনাকে তেমন কিছুই করতে হবে না। যে ইমোজি ব্যবহার করতে চান শুধু ইমোজিটা কপি করে এনে মার্কডাউনে পেস্ট করতে হবে।
এখানে আমি চেষ্টা করেছি মার্কডাউন নিয়ে কাজ করতে গেলে সচারচর যে বিষয় গুলো সম্পর্কে ধারনা থাকটা জরুরী সেই বিষয় গুলো নিয়ে আলোচনা করার। আপনি যদি মার্কডাউন সম্পর্কে আরও বিস্তারিত জানতে আগ্রহী হন তাহলে মার্কডাউন এর অফিসিয়াল ডকুমেন্টেশন টা দেখতে পারেন।
একদম নতুনদের জন্য বাংলায় টেইলউইন্ড সিএসএস

আমরা যারা ওয়েব ডিজাইন সেক্টরে আছি বা আসব বলে ভাবছি তাদের সিএসএস ফ্রেমওয়ার্ক এর শুরুটা হয়ত বুটস্ট্র্যাপ দিয়েই হয়েছে বা হবে, কারণ এটি নতুনদের জন্য শুরু করাটা খুব সহজ এবং আমাদের দেশে এর চাহিদাও অনেক। কিন্তু বেশ কয়েক বছর যাবৎ একটি সিএসএস ফ্রেমওয়ার্ক এর নাম আমরা খুবই শুনে আসছি (বলতে পারেন ট্রেন্ড) সেটি হল টেইলউইন্ড সিএসএস। আর যারা বিভিন্ন জাভাস্ক্রিপ্ট লাইব্রেরি, ফ্রেমওয়ার্ক নিয়ে কাজ করেন বা শুরু করেছেন যেমনঃ React, Vue ইত্যাদি তাদের কাছেতো টেইলউইন্ড সিএসএস নামটা খুবই পরিচিত। এমনকি বর্তমান সময়ে টেইলউইন্ড সিএসএস সবচেয়ে জনপ্রিয় সিএসএস ফ্রেমওয়ার্ক। আজকে আমি চেষ্টা করব খুব সহজভাবে টেইলউইন্ড সিএসএস সম্পর্কে লিখতে, যেন নতুনরা খুব সহজে টেইলউইন্ড সিএসএস শুরু করতে পারেন।
সংক্ষেপে টেইলউইন্ড সিএসএসঃ
টেইলউইন্ড সিএসএস কে ইউটিলিটি ফার্স্ট সিএসএস ফ্রেমওয়ার্ক বলা হয়। এখানে আপনি ইউটিলিটি সিএসএস ক্লাস ডিরেক্ট এইচটিএমএল ফাইলে লিখে সব ধরনের ডিজাইন করতে পারবেন। টেইলউইন্ড সিএসএস ব্যবহার করলে আপনাকে এইচটিএমএল ফাইলের বাহিরে আসলে তেমন কিছু করতে হবে না। এটি অনেক fast, flexible এবং relaible। টেইলউইন্ড সিএসএস মূলত অনেক গুলো ইউটিলিটি সিএসএস ক্লাসের সমন্বয়ে তৈরি তাই ডেভেলপমেন্ট টাইমে সিএসএস ফাইল সাইজ বেশি হলেও যখন প্রোডাকশনের জন্য বিল্ড করা হয় তখন শুধু এইচটিএমএল ফাইলে ব্যবহৃত সিএসএস ক্লাস গুলোর জন্য যে স্টাইল গুলো আছে শুধুমাত্র সেই স্টাইল গুলোকে জেনারেট করে খুব ছোট একটা সিএসএস ফাইল আমাদেরকে দেয়। যেখানে কোন অপ্রয়োজনীয় অথবা ডুপ্লিকেট সিএসএস থাকে না।
টেইলউইন্ড সিএসএস কিভাবে কাজ করেঃ
টেইলউইন্ড সিএসএস মূলত যেকোনো এইচটিএমএল ফাইল, জাভাস্ক্রিপ্ট কম্পোনেন্ট অথবা যেকোন ধরনের টেম্পলেট ফাইল থেকে সিএসএস ক্লাস নামগুলো স্ক্যান করে তারপর স্ক্যানকৃত সিএসএস এর জন্য যে স্টাইল গুলো আছে সেগুলো জেনারেট করে আমাদের কে একটা স্ট্যাটিক সিএসএস ফাইল দেয় যে ফাইল টা এইচটিএমএল ফাইল এর হেড সেকশন এ কল করতে হয়।
টেইলউইন্ড সিএসএস ইনস্টলেশনের ধাপসমূহঃ
আমরা বেশ কয়েকভাবে প্রোজেক্ট এ টেইলউইন্ড সিএসএস ইনস্টলেশন করতে পারি। যেমনঃ Tailwind CLI ব্যবহার করে, PostCSS ব্যবহার করে এবং CDN ব্যবহার করে। আপনার কাছে মনে হতে পারে CDN ব্যবহার করা সহজ কিন্তু এখানে সবচেয়ে বড় সমস্যা হল এখানে আপনি টেইলউইন্ড কনফিগারেশন এবং কাস্টমাইজেশন ফিচার পাবেন না। আমি এখানে Tailwind CLI ব্যবহার করে কিভাবে প্রোজেক্ট এ টেইলউইন্ড সিএসএস ইন্সটল করবেন সেইটা দেখাব
ধাপ-১ঃ
প্রথমে আমাদের প্রোজেক্ট এ node (আপনার মেশিনে অবশ্যই Node.js ভার্সন 12.13.0 অথবা এর চেয়ে আপগ্রেড ভার্সন ইন্সটল থাকতে হবে) initialize করে নিতে হবে। প্রোজেক্ট ফোল্ডার তৈরি করুন এবং প্রোজেক্ট ফোল্ডার এ টার্মিনাল ওপেন করে নিম্নের কমান্ড টা টাইপ করুন এবং এন্টার বাটন এ প্রেস করুন।
npm init -y
ধাপ-২ঃ
এখন দেভ ডিপেন্ডেন্সি হিসাবে টেইলউইন্ড সিএসএস ইন্সটল করতে হবে। এই জন্য নিম্নের কমান্ড টা টার্মিনালে টাইপ করুন এবং এন্টার বাটন এ প্রেস করুন।
npm install -D tailwindcss
ধাপ-৩ঃ
এখন tailwind.config.js ফাইল তৈরি করতে হবে যেখানে টেইলউইন্ড সিএসএস এর সব ধরনের কনফিগারেশন থাকে। এই জন্য নিম্নের কমান্ড টা টার্মিনালে টাইপ করুন এবং এন্টার বাটন এ প্রেস করুন।
npx tailwindcss init
ধাপ-৪ঃ
tailwind.config.js ফাইল এর content array এর মধ্যে সকল টেম্পলেট এর এক্সটেনশন লিখে দিতে হবে যেখান থেকে টেইলউইন্ড সিএসএস ইউটিলিটি স্ক্যান করবে। মানে আমরা যে যে ফাইল এ টেইলউইন্ড সিএসএস এর সাপোর্ট চাই সেগুলো। যেমনঃ আমরা এখানে শুধু এইচটিএমএল ফাইল এ টেইলউইন্ড সিএসএস লিখব তাই এখানে .html লিখেছি content array এর মধ্যে।
//tailwind.config.js file
module.exports = {
content: ["*.{html}"],
theme: {
extend: {},
},
plugins: [],
}
ধাপ-৫ঃ
এখন ২টা ফোল্ডার তৈরি করতে হবে। আমি ফোল্ডার এর নাম দিলাম যথাক্রমে src এবং dist। src ফোল্ডার এর মধ্যে input.css নামে (যেকোনো নামে হতে পারে) একটা সিএসএস ফাইল তৈরি করব এবং dist ফোল্ডার এর মধ্যে output.css নামে (যেকোনো নামে হতে পারে) একটা সিএসএস ফাইল তৈরি করব। input.css ফাইলটি মূলত Tailwind নিজে ব্যবহার করবে, যেখানে টেইলউইন্ড সিএসএস এর সকল ডিরেক্টিভ গুলো থাকবে। এই ডিরেক্টিভ গুলোর মাধ্যমে টেইলউইন্ড সিএসএস এর base, components এবং utilities সিএসএস গুলো কল হবে। input.css ফাইলে আমাদের নিম্নের কোড লিখতে হবে।
/* src/input.css */
@tailwind base;
@tailwind components;
@tailwind utilities;
ধাপ-৬ঃ
এখন টেইলউইন্ড ডেভেলপার মোডে কিভাবে বিল্ড হবে সেটা বলে দেয়ার জন্য package.json ফাইলে আমাদেরকে একটি বিল্ড স্ক্রিপ্ট লিখে দিতে হবে। এই স্ক্রিপ্টের মাধ্যমে Tailwind CLI টেম্পলেট ফাইল স্ক্যান করে স্ট্যাটিক সিএসএস বিল্ড করবে।
"scripts": {
    "build": "tailwindcss -i ./src/input.css -o ./dist/output.css -w"
}
এখানে -i এর পরে ইনপুট সিএসএস ফাইলের এর পাথ, -o এর পরে অউটপুট সিএসএস ফাইলের পাথ নির্দেশ করে দিতে হবে এবং -w এর মাধ্যমে আমরা ওয়াচ ফ্ল্যাগ চালু করে দিয়েছি যাতে tailwind.config.js বা input.css ফাইলে কোন পরিবর্তন হলে অটোমেটিক টেইলউইন্ড বিল্ড হয়।
ধাপ-৭ঃ
এখন output.css ফাইলটি এইচটিএমএল ফাইলের হেডট্যাগ এর মধ্যে কল করতে হবে।
<link rel="stylesheet" href="dist/output.css">
ধাপ-৮ঃ
আমাদের প্রোজেক্ট এখন ১০০% প্রস্তুত টেইলউইন্ড সিএসএস লেখার জন্য। যেকোনো এইচটিএমএল ট্যাগের ক্লাস হিসাবে টেইলউইন্ড সিএসএস ইউটিলিটি ক্লাস গুলো লিখলেই প্রত্যাশিত অউটপুট পেয়ে যাবেন। কিন্তু এর আগে টার্মিনাল এ আপনাকে আর একটা কমান্ড চালু রাখতে হবে সেইটা নিম্নরূপঃ
npm run build
ধাপ-৯ঃ
এই ধাপটা একেবারে অপশনাল আপনি যদি কোড এডিটরে টেইলউইন্ড সিএসএস এর ইন্টেলিজেন্স সাপোর্ট পেতে চান তাহলে টেইলউইন্ড সিএসএস এর নিজস্ব এক্সটেনশন আপনার কোড এডিটরে ইন্সটল করে নিতে পারেন। যেমনঃ Visual Studio Code এর জন্য Tailwind CSS IntelliSense এক্সটেনশন।

ইউটিলিটি-ফার্স্ট ফান্ডামেন্টালসঃ
আমি আগেও বলেছি টেইলউইন্ড সিএসএস হল অনেক গুলো ইউটিলিটি সিএসএস ক্লাস নিয়ে গঠিত একটা সিএসএস ফ্রেমওয়ার্ক। ইউটিলিটি ফিচার টাই মূলত টেইলউইন্ড সিএসএসকে অন্য সকল সিএসএস ফ্রেমওয়ার্ক থেকে আলাদা করেছে। বুটস্ট্র্যাপ সিএসএস ফ্রেমওয়ার্ক যেমন আমাদেরকে একটা কমপ্লিট কম্পোনেন্ট দেয় অপরদিকে টেইলউইন্ড সিএসএস ফ্রেমওয়ার্ক আমাদেরকে এমন কমপ্লিট কম্পোনেন্ট দেয় না। বুটস্ট্র্যাপের একটা কম্পোনেন্ট এর মধ্যে margin, padding, width, height, font-size, color এসব আগে থেকেই বলা থাকে আমরা শুধু সেই কম্পোনেন্ট এর এইচটিএমএল মার্কআপটা আমাদের এইচটিএমএল ফাইলে বসালেই সুন্দর একটা কার্ড কম্পোনেন্ট পেয়ে যাই। অন্যদিকে টেইলউইন্ড সিএসএস এমন কম্পোনেন্ট না দিয়ে margin, padding এর মত লো লেভেল সিএসএস দিয়ে তৈরিকৃত অসংখ্য ইউটিলিটি ক্লাস আমাদেরকে প্রোভাইড করে যেগুলো ব্যবহার করে আমরা নিজেদের ইচ্ছা মতো ডিজাইন করতে পারি।
কোন একটা ডিজাইন যদি আমরা ভ্যানিলা সিএসএস ব্যবহার করে করতে চাই তাহলে আমাদেরকে ২টা বিষয় অবশ্যই করতে হয় তা হল অনেকগুলো অর্থবধক ক্লাস এর নাম লিখতে হয় এবং সেই নাম গুলো ধরে ধরে সিএসএস ফাইলে লাইন বাই লাইন সিএসএস লিখতে হয়। এক্ষেত্রে যেমন আমাদের ক্লাস এর অর্থবধক নাম বের করতে যেয়ে সময় নষ্ট হয় আবার সেইসাথে সিএসএস গুলো নিজে থেকে লিখতে হয় এবং একটা সময় দেখা যায় কোড ডুপ্লিকেশন প্রব্লেমটাও চলে আসে।
অন্যদিকে ইউটিলিটি সিএসএস ব্যবহার করলে আমাদেরকে আর ক্লাস নাম নিয়ে ভাবার দরকার পরে না, টেইলউইন্ড এর ইউটিলিটি ক্লাস গুলোকে ডেকে আনলেই কাজ হয়ে যায়। আপনাদের মনে হতে পারে এতো এতো ইউটিলিটি ক্লাস কিভাবে মনে রাখবো, ভয়ের কিছু নেয় কিছুই মনে রাখতে হবে না, টেইলউইন্ড এর প্রায় সব ইউটিলিটি ক্লাসই ডিক্লারেটিভ এছাড়াও টেইলউইন্ড এর নিজস্ব ইন্টেলিজেন্স সাপোর্ট আপনার কোড এডিটর এ থাকলেতো এসব নিয়ে আপনাকে তেমন কোন চিন্তাই করতে হবে না। কিছুদিন নিয়মিত প্র্যাকটিস করলে সব কিছু আপনার আয়ত্তে চলে আসবে। আরেকটা বিষয় জানা থাকা জরুরী টেইলউইন্ড সিএসএস এর সমস্ত হিসাব করা হয় rem একক দিয়ে, যেমনঃ p-6 মানে padding-1.5rem। চলুন একটা উদাহরণ দেখা যাকঃ

<div class="p-6 max-w-sm mx-auto bg-white rounded-xl shadow-lg flex items-center space-x-4">
        <div class="shrink-0">
                <img class="h-12 w-12" src="https://aiarnob.com/frontend/assets/images/favicons/apple-touch-icon.png" alt="ChitChat Logo">
        </div>
        <div>
                <div class="text-xl font-medium text-black">AI Arnob</div>
                <p class="text-slate-500">You have a new message!</p>
    </div>
</div>
উপড়ের সুন্দর কার্ড টা ডিজাইন করার জন্য কিন্তু আমাদের কোন সিএসএস লিখতে হয় নাই জাস্ট কিছু টেইলউইন্ড ইউটিলিটি ক্লাস ব্যবহার করা হয়েছে। লক্ষ করলে দেখবেন যে, এখানে ইউটিলিটি ক্লাসগুলো কতটা ডিক্লারেটিভ, যেমনঃ
- p-6 এর মাধ্যমে চারপাশে padding দিয়েছি 1.5rem।
- max-w-sm এর মাধ্যমে ম্যাক্সিমাম উইড্থ দিয়েছি sm মানে 24rem।
- mx-auto এর মাধ্যমে মার্জিন বামে এবং ডানে অটো করেছি।
- bg-white এর মাধ্যমে ব্যাকগ্রাউন্ড কালার সাদা দিয়েছি।
- rounded-xl এর মাধ্যমে বর্ডার রউন্ড করেছি।
- shadow-lg এর মাধ্যমে বক্স শ্যাডো অ্যাপ্লাই করেছি।
- flex এর মাধ্যমে ডিভ টাকে ডিসপ্লে ফ্লেক্স করেছি।
এতক্ষণে হয়ত বুঝে গিয়েছেন কিভাবে টেইলউইন্ড ইউটিলিটি ক্লাসগুলো কাজ করে। টেইলউইন্ড সিএসএস এর খুবই সুন্দর একটা ডকুমেন্টেশন আছে এবং সার্চ ফিচার টাও অনেক দুর্দান্ত কাজ করে, আপনার যা প্রয়োজন জাস্ট সার্চ বক্স এ লিখুন রেজাল্ট চলে আসবে চোখের পলকে।
বিভিন্ন ধরনের স্টেট হ্যান্ডল করাঃ (Hover, Focus, and Other States)
এতক্ষণে হয়ত আপনার মনে প্রশ্ন জেগেছে যে, টেইলউইন্ড সিএসএস এর মাধ্যমে আমরা কিভাবে বিভিন্ন ধরনের স্টেট ম্যানেজ করতে পারি। এটার ও একটা খুব ভালো সমাধান আছে। যেকোনো ইউটিলিটি ক্লাসের সামনে আমাদেরকে জাস্ট মডিফায়ার লিখতে হবে। নিম্নের উদাহরণ তা দেখলেই বুঝতে পারবেন।

<button class="bg-sky-600 hover:bg-sky-700 text-white px-7 py-2 rounded-full">
        Click me
</button>
এখানে স্বাভাবিক ভাবে বাটন ব্যাকগ্রাউন্ড কালার দেয়া হয়েছে bg-sky-600 এবং হুভার স্টেট এ ব্যাকগ্রাউন্ড কালার দেয়া হয়েছে hover:bg-sky-700। এখানে hover: টা হল মডিফায়ার। এভাবে :focus, :active, :first-child, :required, ::before, ::after, ::placeholder, ::selection এরকম আরও অনেক মডিফায়ার ব্যবহার করে ইউটিলিটি ক্লাস লেখা যায়। বিভিন্ন স্টেট সম্পর্কে আরও বিস্তারিত জানার জন্য ডকুমেন্টেশন দেখুন।
রেস্পন্সিভ ডিজাইনঃ
টেইলউইন্ড সিএসএস এর বিভিন্ন রেস্পন্সিভ ইউটিলিটি ভারিয়ান্ট আছে যেগুলো ব্যবহার করে জটিল জটিল রেস্পন্সিভ ইন্টারফেস ডিজাইন করা যায়। টেইলউইন্ড সিএসএস মোবাইল ফার্স্ট এপ্রোচ এ কাজ করে তাই রেস্পন্সিভ এর জন্য ডিফল্ট যে ৫ ধরনের ব্রেকপয়েন্ট(চাইলে আপনি ইচ্ছামত কাস্টোমাইজ করতে পারবেন) আছে সেগুলোতে min-width উল্লেখ করা। ব্রেকপয়েন্টগুলো নিম্নরূপঃ
|ব্রেকপয়েন্ট প্রিফিক্স|মিনিমাম উইড্থ|সিএসএস মিডিয়া কুয়েরি|
|-|-|-|
|sm|640px|@media (min-width: 640px) { ... }|
|md| 768px |@media (min-width: 768px) { ... }|
|lg| 1024px |@media (min-width: 1024px) { ... }|
|xl| 1280px |@media (min-width: 1280px) { ... }|
|2xl| 1536px |@media (min-width: 1536px) { ... }|
সরাসরি কোন ইউটিলিটি ক্লাস লিখলে সেটি সবগুলো ডিভাইসে কাজ করে কিন্তু যখন কোন ইউটিলিটি ক্লাসের এর আগে রেস্পন্সিভ ইউটিলিটি ভারিয়ান্ট যেমনঃ sm: লেখা হবে তখন সেটি ডিভাইস উইড্থ 768px এর সমান বা এর চেয়ে বড় হলে কাজ করবে।
<img class="w-16 md:w-32 lg:w-48" src="...">
এখানে ইমেজ এর ডিফল্ট উইড্থ ১৬, মিডিয়াম স্ক্রীন এর জন্য হবে ৩২ এবং লার্জ স্ক্রীন এর জন্য হবে ৪৮। রেস্পন্সিভ ডিজাইন সম্পর্কে আরও বিস্তারিত জানার জন্য ডকুমেন্টেশন দেখুন।
ডার্ক এবং লাইট মোডঃ
টেইলউইন্ড সিএসএস ব্যবহার করে খুব সহজে আপনি আপনার ওয়েবসাইটে ডার্ক মোড এনাবল করতে পারবেন। সাইটকে ডার্ক করার জন্য টেইলউইন্ড সিএসএস dark নামে একটি ভারিয়ান্ট দেয়, যেটি যেকোনো ইউটিলিটি ক্লাস এর সামনে দিলে তখন তা শুধুমাত্র ডার্ক মোডে কাজ করবে।
<button class="bg-sky-600 hover:bg-sky-700 dark:bg-sky-200">
  Save changes
</button>
উপরের কোডে dark:bg-sky-200 লেখা হয়েছে যার ফলে ডার্ক মোডে বাটনটির ব্যাকগ্রাউন্ড কালার হবে bg-sky-200।
ডার্ক মোড স্ট্রাটেজি
ডার্ক মোড স্ট্রাটেজি ২ ধরনের হয় class স্ট্রাটেজি এবং media স্ট্রাটেজি। tailwind.config.js ফাইলে ডার্ক মোড স্ট্রাটেজি বলে দিতে হবে।
//tailwind.config.js file
module.exports = {
  darkMode: 'class',
  // ...
}
আপনি যদি কাস্টম বাটন ব্যবহার করে ডার্ক এবং লাইট মোড toggle করতে চান তাহলে class স্ট্রাটেজি ব্যবহার করতে পারেন আর যদি চান যে অপারেটিং সিস্টেমের প্রেফারেন্স এর উপর নির্ভর করে সাইট ডার্ক অথবা লাইট হবে তাহলে media স্ট্রাটেজি ব্যবহার করতে হবে। ডার্ক মোড সম্পর্কে আরও বিস্তারিত জানার জন্য ডকুমেন্টেশন দেখুন।
পুনরায় ব্যবহারযোগ্য স্টাইলঃ
আমাদের প্রোজেক্ট এ অনেক সময় একই ডিজাইনের কম্পোনেন্ট একাধিক জায়গায় ব্যবহার করতে হয় তখন দেখা যায় ইউটিলিটি ক্লাসগুলোর ডুপ্লিকেশন চলে আসে। যেমনঃ নিম্নের ডিজাইনে রাউন্ডেড অবতার ডিজাইন বার বার রিপিট করা হয়েছে যার ফোলে একই ইউটিলিটি ক্লাস এর ডুপ্লিকেশন তৈরি হয়েছে।

<div class="p-6 max-w-sm mx-auto bg-white rounded-xl shadow-lg">
        <div class="flex items-center space-x-2 text-base">
                <h4 class="font-semibold text-slate-900">Users</h4>
            <span class="rounded-full bg-slate-100 px-2 py-1 text-xs font-semibold text-slate-700">100</span>
        </div>
        <div class="mt-3 flex -space-x-2 overflow-hidden">
                <img class="inline-block h-12 w-12 rounded-full ring-2 ring-white object-cover" src="https://images.unsplash.com/photo-1491528323818-fdd1faba62cc" alt=""/>
                <img class="inline-block h-12 w-12 rounded-full ring-2 ring-white object-cover" src="https://images.unsplash.com/photo-1550525811-e5869dd03032" alt=""/>
                <img class="inline-block h-12 w-12 rounded-full ring-2 ring-white object-cover" src="https://images.unsplash.com/photo-1500648767791-00dcc994a43e" alt=""/>
                <img class="inline-block h-12 w-12 rounded-full ring-2 ring-white object-cover" src="https://images.unsplash.com/photo-1472099645785-5658abf4ff4e" alt=""/>
                <img class="inline-block h-12 w-12 rounded-full ring-2 ring-white object-cover" src="https://images.unsplash.com/photo-1517365830460-955ce3ccd263" alt=""/>
        </div>
        <div class="mt-3 text-sm font-medium">
                <a href="#" class="text-blue-500">+ 95 others</a>
        </div>
</div>
ইউটিলিটি ক্লাস এর ডুপ্লিকেশন সমস্যা সমাধানের জন্য টেইলউইন্ড সিএসএস আমাদের সুন্দর একটা প্রসেস দিয়েছে। input.css ফাইলে @apply ডিরেক্টিভ এর মাধ্যমে আমরা আমাদের নিজেরদের পছন্দ মতো ক্লাস নাম দিয়ে নতুন একটা কম্পোনেন্ট তৈরি করতে পারি।
@tailwind base;
@tailwind components;
@tailwind utilities;
@layer components {
  .user-avatar {
    @apply inline-block h-12 w-12 rounded-full ring-2 ring-white object-cover;
  }
}
এখন আমরা শুধু user-avatar ক্লাস টা ব্যবহার করলেই রাউন্ডেড অবতার ডিজাইনটা পেয়ে যাব। আরেকটা বিষয় @layer ডিরেক্টিভের মাধ্যমে নির্ধারিত হয় আমাদের তৈরি করা স্টাইল base, components নাকি utilities এর আন্ডার এ যাবে সেইটা।
এখানে আমি চেষ্টা করেছি নতুনদের জন্য টেইলউইন্ড সিএসএস এর বেসিক টা তুলে ধরতে এবং টেইলউইন্ড ভীতিটা দূর করতে। এই লেখাটি মনোযোগ দিয়ে পরে থাকলে আপনি টেইলউইন্ড সিএসএস ব্যবহার করে ডিজাইন করার জন্য প্রাথমিক ভাবে প্রস্তুত। টেইলউইন্ড সিএসএস এর আরও অ্যাডভান্স কিছু বিষয় আছে যেগুলো আপনারা অফিসিয়াল ডকুমেন্টেশন থেকে দেখে নিতে পারেন।
How to Install WordPress and Essential Plugins Using WP-CLI
Setting up a WordPress site can be time-consuming if done manually, but with WP-CLI, the process becomes much faster and more efficient. In this tutorial, I’ll show you how to install WordPress along with a few essential plugins using a single command sequence.
Step 1: Download WordPress Core
First, you’ll need to download the WordPress core files. This command will download WordPress to a directory called mywebsite.
wp core download --path=mywebsite
Step 2: Create the Configuration File
Navigate into the newly created mywebsite directory, and create the wp-config.php file with your database credentials:
cd mywebsite
wp config create --dbname=silk --dbuser=root --dbpass=root
Step 3: Create the Database
Now, create the database using the following command:
wp db create
Step 4: Install WordPress
Install WordPress using your local URL, site title, and admin credentials:
wp core install --url=mywebsite.test --title="Site Title" --admin_user=admin --admin_password=admin --admin_email=mywebsite@welabs.dev
Step 5: Install and Activate Plugins
Finally, install and activate the necessary plugins. In this example, we’ll install WooCommerce and Dokan Lite:
wp plugin install woocommerce --activate
wp plugin install dokan-lite --activate
All-in-One Command Sequence
For your convenience, here’s the entire process in one continuous block of code. Just copy and paste the code below into your terminal to install WordPress and a few plugins with a single command.
wp core download --path=mywebsite
cd mywebsite
wp config create --dbname=silk --dbuser=root --dbpass=root
wp db create
wp core install --url=mywebsite.test --title="Site Title" --admin_user=admin --admin_password=admin --admin_email=mywebsite@welabs.dev
wp plugin install woocommerce --activate
wp plugin install dokan-lite --activate
Prerequisite: Install WP-CLI to you machine.